Step 1: Login to the administration page
You must be logged into the administration page and click on "Catalog" > "Categories". In that page click on the "+" sign to add new Presta Shop category and it will lead to the category creation page. Enter the necessary as below
1. Title
2. Display toggle = Yes
3. Parent Category - refer to the image below. On this options, you can expand the parent category folder and you can create another sub-category for each category. However, if you want them to appear on the home page just tick on the Home parent category.
4. Description - optional but it is necessary to describe generally what product in the category
5. Cover image - optional but it's good to make the category looks nicer
6. Meta Tag title, meta tag descriptions, and meta keywords: are important for search engine to discover the category so enter them wisely which related to the products.
Once all is done save the category.
Step 2: Assign the category
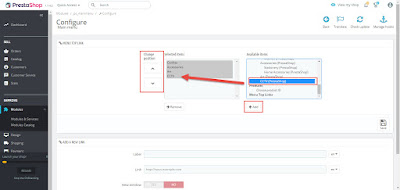
To enable the category to appear in the homepage you need to assign the category to the menu. Modules >> Module and Services and find Main Menu module and click Configure. Now find the category that you have created earlier and click add. Use the toggle up and down to adjust the position whether to be first or last and once all that is done click Save. Now browse to your store and you will see the menu appear on the homepage.


No comments:
Post a Comment